English
 русский
Jun 22,2026
Content
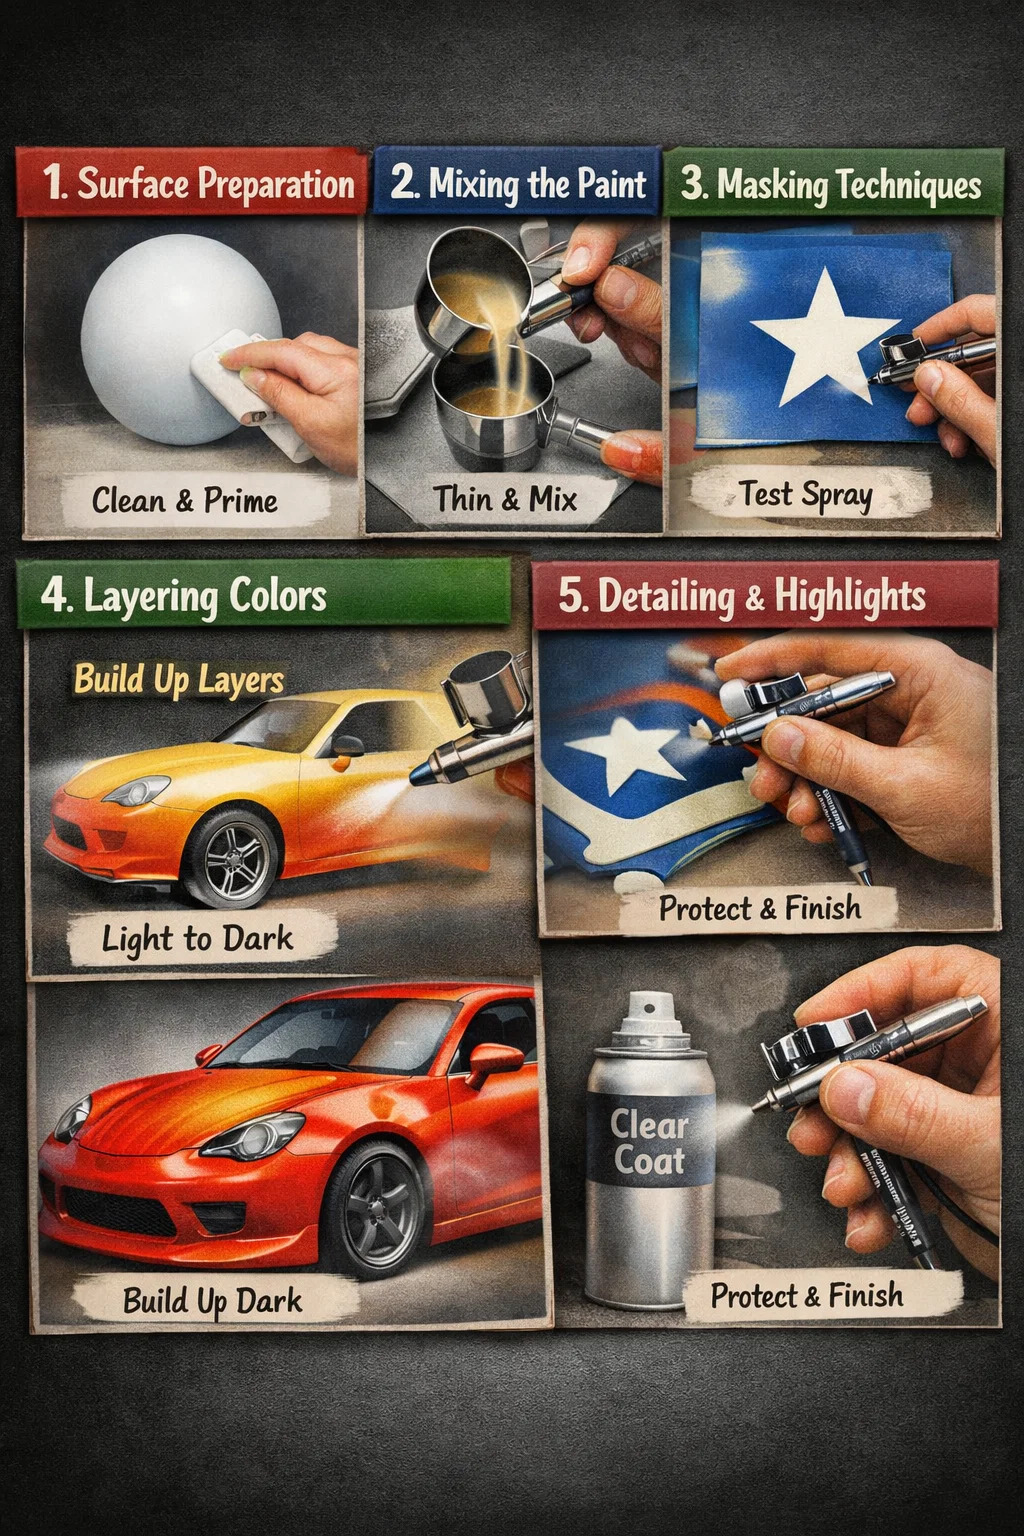
Creating a complete image or artwork using an airbrush is essentially a process of "building up layers from light to dark." You can think of it as "spraying light and shadow" onto the surface of an object.
Here are the main steps to complete an airbrush painting:
1. Preparation and Surface Treatment
Before you start painting, the condition of the base material determines the quality of the final result.
Clean the surface: Ensure the surface of the object you are painting (whether it's a model, canvas, or helmet) is clean, free of dust and grease.
Priming and leveling: Usually, a primer coat is applied first. This allows subsequent paints to adhere better and creates a more uniform base color. If the surface is uneven, the paint will appear patchy.
2. Diluting and Adjusting the Paint
This is crucial for the smooth operation of the airbrush.
Mixing ratio: Mix the paint and thinner. A common rule of thumb is to observe its flow on the side of the cup; it should be smooth like "cold milk."
Test spray: Before starting, spray a few times on a piece of scrap paper to confirm that the atomization is fine and there are no small splatters.
3. Using Masking Tools (Core Technique)
If you want to spray patterns with sharp edges (such as a star or a number), you will need to use masking.
Masking tape and stencils: Use special low-tack masking tape to cover the areas you don't want to paint, or simply place a stencil over the area.
Freehand spraying: If you are aiming for a hazy, soft effect (such as clouds or skin shadows), you can spray freehand without masking, utilizing the atomization properties of the airbrush.
4. Layering Colors from Light to Dark
Airbrush painting usually follows the logic of "light colors first, then dark colors."
Thin coats, multiple layers: Never try to spray a rich color in one go. The correct approach is to gently press the trigger, allowing the color to settle in thin layers like a mist. This will result in very even color and prevent drips.
Adding depth: First, spray the large areas with the main color, then switch to a darker color and spray shadows in the recessed or shaded areas of the object. This will immediately add depth to the image.
5. Detailing and Finishing
Once the main outlines are complete, you can move on to the refinement stage.
Zoom in: Bring the airbrush closer to the object, reduce the paint flow, and use it like a pen to outline lines or add highlights.
Cleaning and Protection: After completion, remember to spray a layer of clear protective varnish (gloss or matte) to keep the colors vibrant and protected from scratches and bumps.