 English
 русский
Sep 21,2026
Content
- 1 How to Work an Airbrush: The Short Answer
- 2 Understanding Airbrush Anatomy Before You Start
- 3 Setting Up Your Airbrush System
- 4 Mixing and Loading Paint Correctly
- 5 Airbrush Spraying Technique Step by Step
- 6 Common Airbrush Problems and Fixes
- 7 Cleaning and Maintaining Your Airbrush
- 8 Practice Exercises to Build Airbrush Control
- 9 Choosing the Right Airbrush for Your Skill Level
How to Work an Airbrush: The Short Answer
To work an airbrush correctly, connect it to a compressed air source, load properly thinned paint into the cup or bottle, hold the airbrush 4 to 8 inches from your surface, and press down on the trigger for air while pulling back for paint flow. Mastering an airbrush comes down to controlling three variables at once: air pressure, paint consistency, and trigger movement. Most beginners struggle not because the tool is complicated, but because they rush past these fundamentals. Once these three elements are balanced, an airbrush becomes one of the most precise and versatile tools for painting models, illustrations, nails, textiles, and automotive finishes.
This guide breaks down each stage of airbrush operation, from initial setup to advanced spraying techniques, so that both first-time users and those upgrading their skills can achieve consistent, professional-looking results.
Understanding Airbrush Anatomy Before You Start
Core Components
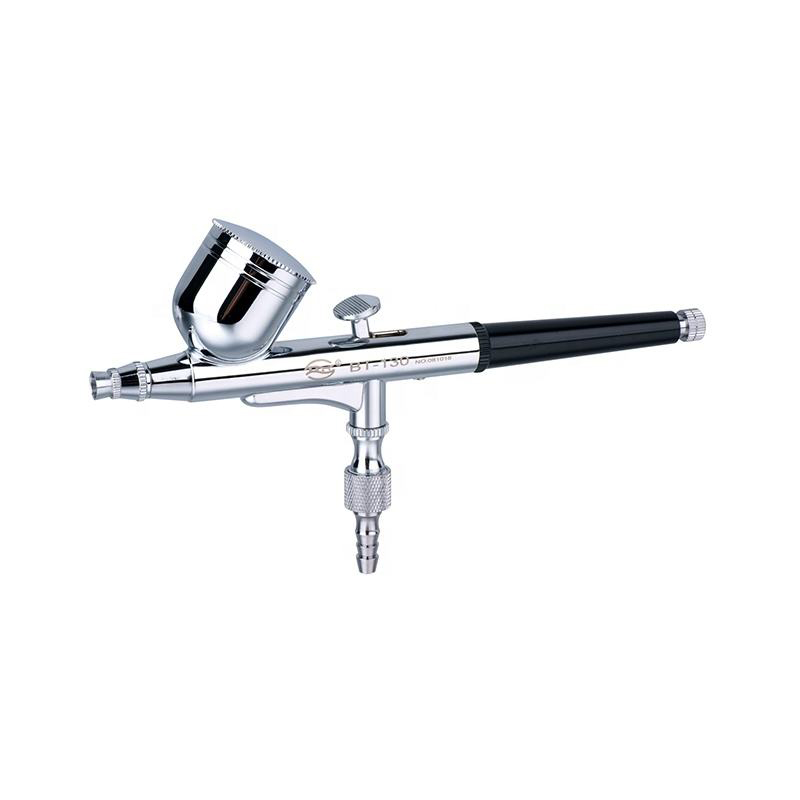
Every airbrush, regardless of brand or price point, shares the same basic parts. Understanding these helps diagnose issues later and makes the learning curve much shorter.
- Trigger – Controls both air release (downward press) and paint flow (backward pull) in dual-action models.
- Needle – A fine metal rod that regulates how much paint passes through the nozzle.
- Nozzle – The tip where air and paint combine and atomize into a fine mist.
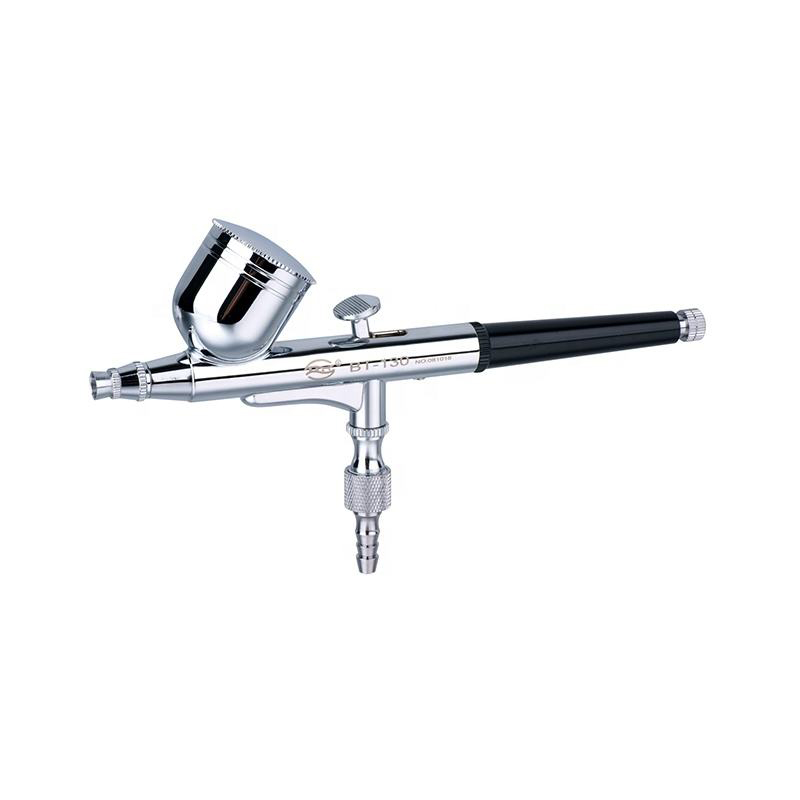
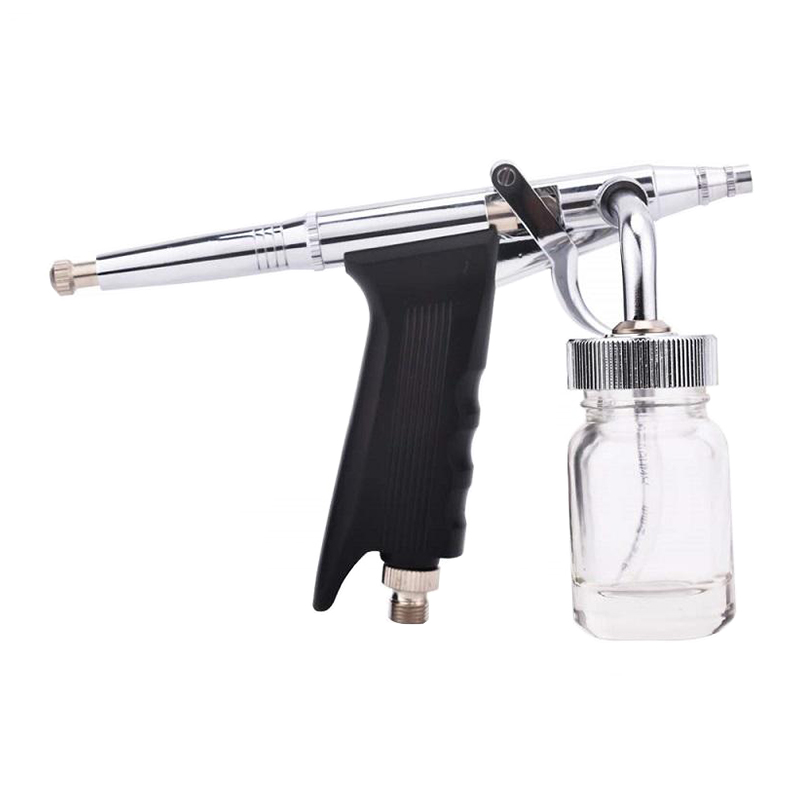
- Paint Cup or Bottle – Holds the paint, either gravity-fed from the top or siphon-fed from below.
- Air Hose Connector – Links the airbrush to a compressor or canned air source.
Single-Action vs Dual-Action Airbrushes
A single-action airbrush releases a fixed amount of paint whenever the trigger is pressed, making it simpler but less flexible. A dual-action airbrush allows independent control of air and paint volume through one trigger motion, giving far greater control over line width and shading. For anyone serious about learning how to work an airbrush effectively, a dual-action, gravity-feed model is generally recommended as the best starting point.
Setting Up Your Airbrush System
| Application | Recommended PSI |
|---|---|
| Fine detail and line work | 10 - 15 PSI |
| General model painting | 15 - 25 PSI |
| Base coats and larger surfaces | 25 - 35 PSI |
| Thicker paints or textiles | 35 - 50 PSI |
Before spraying, attach the airbrush to a stable air source such as a compressor with a moisture trap and regulator. A regulator is essential because consistent pressure is one of the biggest factors in achieving even coverage. Fluctuating pressure causes splotchy application, so investing in a compressor with a built-in tank helps maintain steady airflow during longer sessions.
Mixing and Loading Paint Correctly
Paint consistency is one of the most common reasons an airbrush clogs or sprays unevenly. Most craft and acrylic paints are too thick straight from the bottle and need thinning before use.
General Thinning Ratio Guidelines
A commonly referenced starting ratio is 2 parts paint to 1 part thinner or water, adjusted based on the paint brand and desired finish. The ideal consistency is often compared to skim milk: thin enough to flow smoothly through the nozzle, but not so watery that it fails to build color.
- Pour a small amount of paint into a mixing container.
- Add thinner or water gradually, stirring continuously.
- Test the flow by loading a small amount into the airbrush cup.
- Spray a test line on scrap paper or cardboard.
- Adjust thickness further if the line sputters or the mist looks too heavy.
Always strain paint through a fine mesh filter before loading it, since even small clumps can block the narrow nozzle opening, which is often smaller than 0.5 mm in fine-detail airbrush tips.
Airbrush Spraying Technique Step by Step
Once your airbrush is loaded and pressure is set, technique determines the final result. Follow this sequence for smooth, even application:
- Hold the airbrush perpendicular to the surface, keeping a consistent distance of roughly 4 to 8 inches.
- Begin moving your hand before pressing the trigger to avoid a concentrated paint blob at the starting point.
- Press down for air first, then gently pull back to release paint.
- Move in smooth, even strokes, overlapping passes by about 50 percent for uniform coverage.
- Release the trigger forward before stopping your hand movement to prevent paint pooling.
- Apply multiple thin layers rather than one thick coat, allowing brief drying time between passes.
Distance directly affects line width and softness. Holding the airbrush closer produces sharp, narrow lines ideal for detail work, while increasing distance creates broader, softer gradients suitable for shading and blending.
Common Airbrush Problems and Fixes
Even experienced users encounter occasional spraying issues. Recognizing the cause quickly saves time and paint.
| Problem | Likely Cause | Fix |
|---|---|---|
| Spitting or sputtering | Air bubbles or loose needle cap | Tighten needle cap and check paint level |
| Grainy or textured spray | Paint too thick or pressure too low | Thin paint further or increase PSI |
| Paint pooling or runs | Paint too thin or held too close | Reduce paint flow and increase distance |
| No paint coming out | Clogged nozzle or dried paint | Soak and clean nozzle, replace needle if damaged |
Cleaning and Maintaining Your Airbrush
Cleaning is not optional with airbrushing; it is a core part of every session. Dried paint inside the nozzle or needle channel is the leading cause of premature airbrush failure and inconsistent spray patterns.
After Every Color Change
Flush the airbrush with water or the appropriate thinner between colors. Spray the cleaning solution through the airbrush until it runs clear, then wipe the nozzle tip with a soft cloth.
After Each Full Session
- Disassemble the needle and nozzle following the manufacturer's instructions.
- Soak removable parts in cleaning solution to dissolve residue.
- Use a soft brush to clear the paint cup and internal channels.
- Dry all components fully before reassembling to prevent corrosion.
A well-maintained airbrush can last for years of regular use, while neglecting cleaning routines often leads to needle damage or irreversible nozzle clogging within just a few sessions.
Practice Exercises to Build Airbrush Control
Developing confident airbrush control takes deliberate practice, similar to learning any hand-eye coordination skill. The following exercises are commonly used by instructors to help beginners internalize trigger control and distance management.
- Practice spraying straight parallel lines at a consistent distance to build steady hand movement.
- Create dots of varying sizes by adjusting how long the trigger is held.
- Practice gradients by slowly moving the airbrush farther from the surface mid-stroke.
- Attempt basic stencil work to understand edge control and overspray management.
- Freehand simple shapes such as circles and curves to build overall confidence.
Spending even 15 to 20 minutes practicing basic strokes before starting a real project significantly improves consistency and reduces wasted paint on mistakes.
Choosing the Right Airbrush for Your Skill Level
Selecting an appropriate airbrush setup matters as much as technique. Beginners often benefit from a dual-action, gravity-feed airbrush paired with a quiet, tank-equipped compressor, since this combination offers the best balance of control and affordability. Those working on larger projects such as automotive panels or wide illustrations may prefer a siphon-feed airbrush with a larger paint reservoir, while hobbyists focused on fine detail work, such as miniature painting, typically favor airbrushes with a 0.2 to 0.3 mm nozzle size.
As a company focused on airbrush equipment and accessories, understanding these distinctions helps match the right airbrush model to a user's specific project needs, whether that involves fine art, model building, cosmetics, or automotive finishing. Selecting equipment suited to the task, combined with consistent practice and proper maintenance, is the most reliable path to mastering how to work an airbrush effectively.