 English
 русский
Jun 22,2026
Content
- 1 What Modelling Painting Actually Involves — And Where to Start
- 2 Understanding Paint Types Used in Modelling Painting
- 3 Choosing the Right Airbrush for Modelling Painting
- 4 Compressors, Pressure, and Air Supply for Airbrushing Models
- 5 Core Airbrush Techniques in Modelling Painting
- 6 Brush Painting Techniques That Complement Airbrush Work
- 7 Primer Selection and Surface Preparation in Modelling Painting
- 8 Weathering and Finishing Effects in Scale Modelling Painting
- 9 Common Airbrush Problems in Modelling Painting and How to Fix Them
- 10 Airbrush Maintenance — Keeping Your Tool Performing in Modelling Painting
- 11 Building a Modelling Painting Workspace
- 12 Getting Better at Modelling Painting — A Progressive Learning Path
What Modelling Painting Actually Involves — And Where to Start
Modelling painting is the process of applying colour, texture, and finish to scale models — whether military vehicles, aircraft, figures, cars, ships, or fantasy miniatures. It is both a technical discipline and an artistic one, demanding an understanding of paints, tools, surfaces, and light. The single most impactful decision a modeller makes is choosing between brush painting and airbrush painting, because each method produces fundamentally different results and suits different stages of a project.
The airbrush is the cornerstone tool in serious modelling painting. It allows you to apply ultra-thin coats, blend colours seamlessly, create realistic shading, and cover large surface areas with an evenness that a hand brush simply cannot replicate. That said, brush painting remains essential for detail work, washes, and areas the airbrush cannot reach. The most capable modellers use both — understanding exactly when each tool earns its place.
This guide covers the full spectrum of modelling painting: paints and their properties, airbrush setup and technique, brush methods, weathering, and common problems with their solutions. Whether you are painting a 1:35 scale tank or a 28mm wargaming miniature, the principles translate directly.
Understanding Paint Types Used in Modelling Painting
Before picking up a brush or loading an airbrush, you need to understand what you are working with. The paint type determines thinning ratios, drying times, compatibility with other products, and the kind of finish you can achieve.
Acrylic Paints
Acrylics dominate modern modelling painting. Brands like Vallejo, Citadel, AK Interactive, Mr. Hobby Aqueous, and Tamiya Acrylic are water-based, fast-drying, and low in odour. They clean up with water (or isopropyl alcohol), making them practical for home workshops. Thinned correctly — typically to a skimmed-milk consistency — acrylics flow beautifully through an airbrush needle as small as 0.2mm.
One limitation is that acrylics can redissolve when you apply subsequent coats, so technique matters. Airbrushing thin passes rather than flooding the surface avoids lifting previous layers. A dedicated acrylic airbrush thinner (not just water) also improves flow and retards tip-dry — a common frustration where paint dries on the needle tip and blocks spray.
Lacquer Paints
Lacquers — such as Mr. Color, Gaianotes, and Tamiya Lacquer — are solvent-based and among the toughest, most chip-resistant paints available. They are the preferred choice for base coats and modulation coats when using an airbrush on vehicle models, particularly where durability matters for handling. Lacquers typically dry to touch in under 10 minutes, which speeds up the modelling painting workflow considerably.
The trade-off is fumes. Lacquer thinners are aggressive solvents, and you should always airbrush lacquers in a well-ventilated area or a spray booth fitted with active carbon filtration. A respirator rated for organic vapours is not optional — it is a baseline safety requirement.
Enamel Paints
Enamels such as Humbrol and AK Real Colors have been used in modelling painting for decades. They are slower drying and blend easily with a brush, making them ideal for panel line washes and oil-like blending effects. While they can be airbrushed, most contemporary modellers use enamels primarily for washes applied over a sealed acrylic or lacquer base coat. Enamel washes can be removed or adjusted with white spirit without disturbing the sealed paint underneath — a technique that gives tremendous control over weathering effects.
| Paint Type | Best For | Airbrush Compatible | Dry Time (Touch) | Thinner |
|---|---|---|---|---|
| Acrylic | Base coats, detail work, washes | Yes | 15–30 min | Water / Acrylic thinner |
| Lacquer | Base coats, colour modulation | Yes (ideal) | 5–10 min | Lacquer thinner |
| Enamel | Washes, blending, chipping fluid | Possible | 60–120 min | White spirit / enamel thinner |
Choosing the Right Airbrush for Modelling Painting
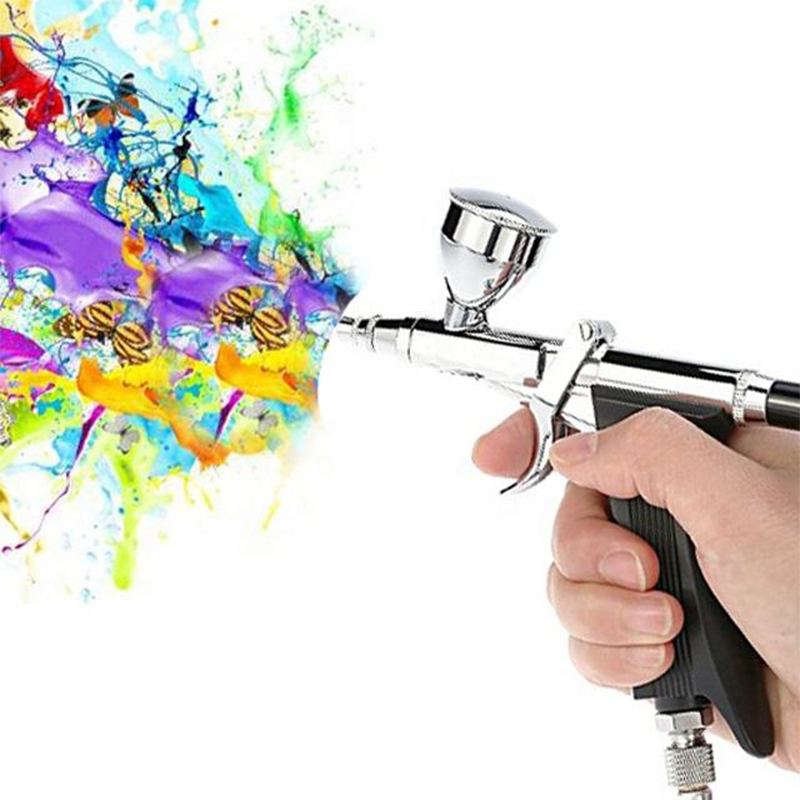
The airbrush is not a single tool — it is a category of tools, and understanding the differences between types will save you from buying the wrong equipment and experiencing months of frustration. For modelling painting specifically, the requirements are different from illustration or automotive refinishing.
Double-Action vs. Single-Action Airbrush
A single-action airbrush has one trigger that controls both air and paint simultaneously. It is simpler to operate and easier to clean, making it suitable for base coating large areas. However, it gives you no mid-spray control over the amount of paint being released — what you set before you begin is what you get throughout.
For modelling painting, a double-action airbrush is the standard choice among experienced modellers. Pressing the trigger down releases air; pulling it back releases paint. The further you pull back, the more paint flows. This separation of controls allows you to vary the spray pattern while painting — narrowing it for fine details and widening it for smooth gradients — without stopping. The learning curve is steeper, but the control it offers is indispensable for colour modulation, pre-shading, and freehand camouflage.
Needle and Nozzle Size
The needle and nozzle diameter determines the spray pattern width and the viscosity of paint that can pass through without clogging. Common sizes for scale modelling are:
- 0.2mm — ultra-fine lines, small-scale figures, hairline details. Requires paint thinned to near-water consistency.
- 0.3mm — the most versatile size for modelling painting. Handles detail work and base coats equally well with properly thinned paint.
- 0.4mm–0.5mm — suited for primer application, large area base coating, and thicker paints like primers or varnishes.
Most modellers working across scales from 1:72 to 1:35 find a 0.3mm double-action gravity-feed airbrush covers roughly 80% of all tasks. A secondary 0.5mm unit makes primer application faster and cleaner.
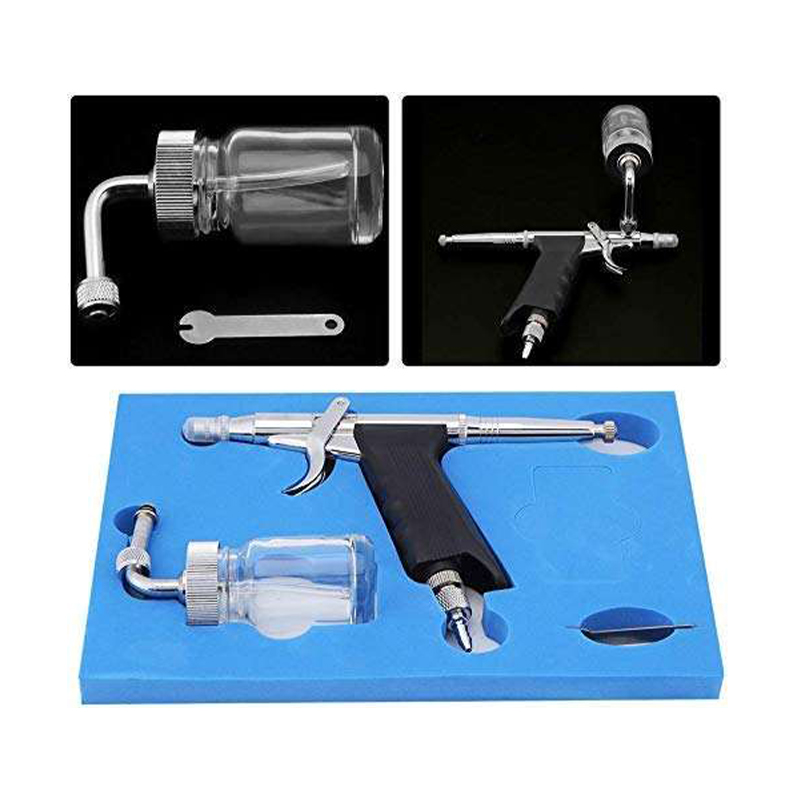
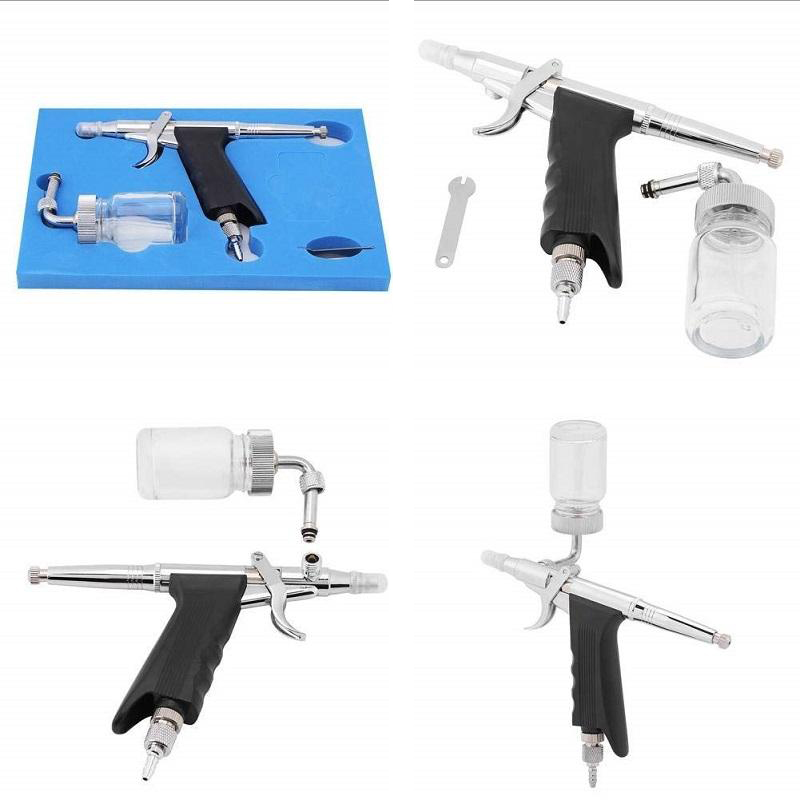
Gravity Feed vs. Siphon Feed
Gravity-feed airbrushes have a paint cup on top; paint falls into the needle assembly by gravity. This design requires less air pressure to operate, wastes less paint (cups typically hold 2–7ml), and cleans quickly between colour changes — all significant advantages in modelling painting where you might swap colours a dozen times per session.
Siphon-feed designs draw paint from a bottle below via a siphon tube. They hold larger volumes, which suits long base-coat sessions, but they need higher air pressure and are slower to clean. For the majority of modelling painting tasks, gravity feed is the recommended starting point.
Recommended Airbrush Models for Scale Modelling
Several airbrush brands have established strong reputations specifically within the modelling painting community:
- Iwata Eclipse HP-CS — a 0.35mm gravity-feed double-action brush widely considered the benchmark for modelling painting. Reliable, consistent, and extensively supported with replacement parts.
- Harder & Steenbeck Evolution — a German-engineered airbrush known for precise needle control and a smooth trigger action. Popular in European modelling communities.
- Badger Patriot 105 — a robust, US-made 0.5mm siphon/gravity airbrush known for handling thicker paints well. Good for primer and base coat work.
- Mr. Hobby PS-270 — an affordable entry point that performs well above its price for modelling painting on armour and aircraft.
Compressors, Pressure, and Air Supply for Airbrushing Models
An airbrush is only as useful as its air supply. Using canned propellant is an option for occasional use, but the pressure drops as the can empties, which creates inconsistency — a significant problem in modelling painting where even spray pressure is critical. A dedicated compressor is the correct long-term investment.
Diaphragm vs. Piston Compressors
Diaphragm compressors are lightweight, inexpensive (typically €30–€60), and oil-free, but they produce pulsed airflow rather than a smooth stream. This pulsing can cause uneven paint application, especially at lower pressures. For serious modelling painting, a piston compressor with an air tank is a better choice.
A piston compressor with a minimum 1-litre tank delivers steady, regulated air pressure, which translates directly to smoother gradients and more consistent coverage with your airbrush. Models like the Sparmax TC-610H or Iwata Smart Jet Pro are popular in modelling workshops. They operate quietly enough for apartment use and maintain stable output between 10 and 30 PSI — the range covering almost all modelling painting tasks.
Recommended Pressure Settings by Task
Pressure is one of the most misunderstood variables in airbrush modelling. Too much pressure atomises paint too aggressively, causing overspray and loss of control. Too little causes splattering and tip-dry. Here are working pressure guidelines:
- Primer application: 20–25 PSI with a 0.4–0.5mm needle
- Base coat (lacquer or acrylic): 15–20 PSI with a 0.3mm needle
- Colour modulation / shading: 12–18 PSI, short bursts, airbrush 3–6cm from surface
- Fine detail and hairlines: 10–15 PSI, needle pulled back minimally, 1–3cm from surface
- Varnish / clear coats: 20–28 PSI to ensure smooth coverage without orange peel
A moisture trap fitted between the compressor and airbrush hose is also essential. Condensed water in the air line produces spitting that destroys paint surfaces. This is a simple, inexpensive addition that prevents one of the most common problems in airbrush modelling.
Core Airbrush Techniques in Modelling Painting
Owning a quality airbrush and compressor is only the beginning. The techniques you apply determine whether a model looks flat and mediocre or realistic and visually compelling. The following methods form the foundation of professional-level modelling painting.
Colour Modulation
Colour modulation is an airbrush technique developed extensively within the scale modelling community — particularly by Polish modeller Mig Jiménez — where you deliberately vary the lightness and saturation of the base colour across the surface of a model to simulate the way light falls on real vehicles and objects. Rather than applying a single uniform colour, you use the airbrush to spray a lighter, more saturated version of the colour on raised areas and upper surfaces, while leaving recesses and lower panels slightly darker.
On a 1:35 scale armour model, a practical modulation sequence might involve four tonal variations of the same base colour: a dark base shadow coat, the standard base colour, a lightened mid-tone for upper surfaces, and a near-white highlight mixed 1:1 with the base colour for the uppermost edges and roof panels. Each is applied with the airbrush using thin, feathered passes rather than concentrated spraying.
Pre-Shading
Pre-shading involves airbrushing dark lines — often black or dark brown — along panel lines, recesses, and shadow areas before applying the base colour. When the base coat is then airbrushed thinly over the top, these dark lines bleed through subtly, creating depth and definition without the need for post-shading washes. This technique works especially well on aircraft and armour models where panel divisions are prominent features.
The key is restraint with the base coat. Two to three very thin passes at around 15 PSI from 8–10cm away allows the pre-shading to remain visible without being overwhelming. If you flood the surface with one heavy coat, the pre-shading disappears entirely.
Zenithal Priming
Zenithal priming is an airbrush technique borrowed from the world of miniature painting but equally applicable to scale vehicle and figure modelling. It involves first priming the entire model black, then airbrushing white or light grey directly from above — simulating a single overhead light source. The result is a model with built-in shadow and highlight information before any colour is applied.
When subsequent colours are applied over a zenithal prime using transparent or semi-transparent layers — a practice known as OSL (object source lighting) in miniature painting — the underlying value map shows through, giving the final paint job a three-dimensional quality that is very difficult to achieve by other means. This is one of the most efficient techniques in modelling painting for producing high-quality results quickly.
Freehand Camouflage Patterns
Painting hard-edged or soft-edged camouflage without masking tape is one of the most impressive airbrush skills in modelling painting. For soft-edged camouflage — as found on most WWII German armour and many modern military vehicles — the airbrush is operated at low pressure (10–14 PSI) with the needle pulled back only slightly and held close to the surface (2–4cm). This produces a naturally soft-edged spray pattern that replicates the brush-applied or spray-gun finishes seen on real vehicles.
For hard-edged camouflage such as those found on modern military aircraft, low-tack masking tape or Blu-Tack strips are used to create crisp boundaries. The airbrush is held at a higher pressure (18–22 PSI) and moved perpendicular to the mask edge to minimise paint bleed under the masking material.
Hairline Details and Panel Accents
At maximum reduced settings — needle barely pulled back, pressure at 8–12 PSI, airbrush tip 1–2cm from the surface — a 0.2mm or 0.3mm airbrush can produce lines as thin as 0.5mm. This is used in advanced modelling painting for edge highlighting on 1:72 aircraft, painting individual armour plate weld lines, or adding subtle tonal variations to individual figure uniform panels. It requires considerable practice and a steady hand, but it produces results that brush painting cannot match in terms of smoothness and consistency.
Brush Painting Techniques That Complement Airbrush Work
The airbrush does not replace the brush in modelling painting — it changes when and how the brush is used. Understanding where each tool excels produces results that neither could achieve alone.
Washes
A wash is a heavily thinned paint — typically enamel or acrylic — applied over a sealed surface and allowed to flow into recesses, panel lines, and shadow areas by capillary action. It is applied with a broad soft brush and left to settle before the excess is removed from raised surfaces using a brush dampened with the appropriate thinner. Washes add immediate depth and realism to modelling painting that would take many airbrush passes to replicate.
Commercial wash products from AK Interactive, Ammo of Mig, and Vallejo are pre-formulated for specific uses — dark brown for wood tones, black for mechanical recesses, rust brown for weathered metal. Applying a wash over a gloss varnish coat ensures it flows freely and can be corrected before drying, a technique that gives modellers significant control over the final result.
Drybrushing
Drybrushing uses a stiff brush loaded with a small amount of paint — most of which is wiped off — then dragged lightly across raised surfaces to leave colour only on the highest points. It is particularly effective for highlighting edge details on armour track links, rubble, foliage, and stone textures in dioramas. Flat, stiff-bristled brushes between 4mm and 12mm wide give the best control for this technique in modelling painting.
Drybrushing is typically done with a lighter shade than the base colour — often 30–50% lighter — and applied after washes have dried and been fixed with a matte varnish coat. The airbrush cannot replicate this effect easily because drybrushing requires physical contact and the random texture that a bristle creates on rough surfaces.
Stippling and Chipping
Paint chipping — where worn areas of a vehicle or equipment expose bare metal or primer beneath — is one of the most common weathering effects in modelling painting. It can be achieved by stippling with a torn piece of blister foam sponge dipped in a slightly contrasting colour, or by using the hairpin/salt masking technique where these materials are applied before an airbrush coat and removed afterwards to reveal the colour underneath.
The sponge chipping method is particularly effective because the irregular cell structure of the foam creates randomised marks that mimic real paint wear convincingly. Silver or gunmetal painted chips along prominent edges such as hatches, tool mountings, and hull corners look especially realistic when this technique is combined with a rust-coloured undercoat applied by airbrush beforehand.
Primer Selection and Surface Preparation in Modelling Painting
No amount of skilful airbrush work will save a model that has been poorly prepared. Surface preparation is the foundation of every successful modelling painting project, and primer is the critical bridge between bare plastic or resin and your paint layers.
Plastic models — particularly injection-moulded styrene — benefit from a thin primer coat to improve paint adhesion. Resin models are slightly more demanding: resin must be washed thoroughly in warm soapy water to remove mould release agent before priming, otherwise paint adhesion fails regardless of how carefully the airbrush work is done.
Lacquer Primer vs. Acrylic Primer
Lacquer primers — such as Mr. Surfacer 1000, 1200, and 1500 from Gunze — are the go-to choice for most experienced modellers. Applied by airbrush at 20–25 PSI, they self-level well, reveal surface defects clearly (which can then be filled and sanded before painting begins), and provide a tough base that subsequent acrylic and enamel layers adhere to without issue. Mr. Surfacer 1500 is particularly valued for its fine grain, which avoids obscuring delicate engraved detail on modern high-detail kits.
Acrylic primers from Vallejo, Stynylrez, and AK Interactive are solvent-free and can be airbrushed indoors without the ventilation requirements of lacquer primers. They adhere well to plastic and resin and dry quickly. For modellers working in spaces with limited ventilation, acrylic primer is the practical solution.
Primer Colour Strategy
Primer colour influences the final appearance of colours applied over it, particularly when working with thin, translucent paints. Standard approaches include:
- Grey primer — neutral base that lets paint colours appear close to their mixed value. The default for most modelling painting projects.
- Black primer — used for zenithal priming or for dark-coloured models where it serves as both primer and base coat. Common in miniature and diorama modelling painting.
- White primer — makes bright colours (yellows, reds, sky blues) more vivid. Essential when painting aircraft in light livery schemes.
- Red oxide / rust primer — used beneath metallic and weathered finishes to provide a realistic rust undertone visible through paint chips and worn areas.
Weathering and Finishing Effects in Scale Modelling Painting
Weathering is where modelling painting transitions from competent to compelling. A perfectly painted model with no weathering looks like a toy; a model with realistic wear, grime, and environmental effects looks like a faithful record of a real object. Both the airbrush and traditional brushes play distinct roles in the weathering process.
Dust, Mud, and Ground Effects
Dust deposits on vehicle models are recreated using pigments — finely ground powders that mimic the texture of real dust and earth. Applied dry with a soft brush and then fixed with a small amount of pigment fixer or isopropyl alcohol, they add a matte, gritty quality to lower hull areas, running gear, and wheel arches that looks far more convincing than anything achievable with paint alone.
For atmospheric dust on upper surfaces and vehicle sides, the airbrush is the superior tool. A very thin mix of light earth or buff colour — thinned to near-water consistency and applied at low pressure from a distance of 15–20cm — leaves a translucent haze over the surface that convincingly replicates the dusty appearance of vehicles operating in dry environments. This effect cannot be replicated with a brush because the coverage needs to be so thin and even.
Rust and Corrosion Effects
Rust is one of the most challenging weathering effects to replicate convincingly in modelling painting because real rust is not uniform — it has multiple tones, textures, and stages. A practical layered approach involves:
- Airbrush a dark brown base in rusted areas using a fine needle at low pressure
- Apply orange-brown and bright orange randomly over the dark base using sponge stippling
- Add yellow-orange to the most prominent raised rust points with a fine brush
- Apply pigments in rust tones over the entire area and fix lightly
- Add small streaks of rust-coloured enamel paint flowing downward from the rust area using a fine brush and enamel thinner to create convincing rust run-off marks
Varnishes and Protective Coats
Varnishes serve two functions in modelling painting: they protect the underlying paint from subsequent weathering stages, and they control surface sheen. Gloss varnish is applied before washes (so enamel washes flow cleanly and can be removed easily); matte varnish is applied at the end of the project to unify the surface and eliminate any inconsistent shine.
Airbrushing varnish gives far more even results than brushing, which can leave brushmarks or create cloudy patches. Using a 0.4–0.5mm needle at 22–28 PSI, varnish is applied in thin, overlapping passes from a distance of 12–15cm. Working in a warm, dry environment (ideally 18–25°C with relative humidity below 60%) prevents milky hazing — a phenomenon caused by moisture trapped in fast-drying varnish.
Common Airbrush Problems in Modelling Painting and How to Fix Them
Even experienced modellers encounter recurring problems with airbrush equipment. Understanding the cause behind each symptom saves time and prevents unnecessary paint damage on models that may represent hours of work.
| Problem | Likely Cause | Solution |
|---|---|---|
| Tip dry (paint dries on needle tip) | Paint too thick or too fast-drying | Add flow improver; reduce pressure; thin paint further |
| Splattering / spitting | Water in air line; paint too thick | Check moisture trap; thin paint; purge air line before spraying |
| Orange peel texture | Pressure too high or paint too thick | Reduce pressure; thin paint more; increase distance slightly |
| Grainy or chalky finish | Airbrush too far from surface or paint too thin | Reduce distance; adjust paint ratio; increase pressure slightly |
| Uneven coverage / pooling | Inconsistent airbrush movement speed | Maintain consistent hand speed; practice on paper first |
| Paint not adhering | Surface contamination or incompatible paint layers | Clean surface with IPA; prime first; check paint compatibility |
Airbrush Maintenance — Keeping Your Tool Performing in Modelling Painting
An airbrush is a precision instrument. The tolerances involved — a 0.3mm needle fitting perfectly within a 0.3mm nozzle — require careful maintenance to sustain. Most airbrush problems in modelling painting trace back not to technique but to inadequate cleaning.
Between-Colour Cleaning
When switching colours mid-session, empty the remaining paint from the cup, add a small amount of airbrush cleaner or appropriate thinner, and spray it through until the spray runs clear. Repeat once more, then load the new colour. This process takes under two minutes and prevents colour contamination.
End-of-Session Deep Clean
At the end of a modelling painting session, a more thorough clean is needed. For acrylic paints:
- Spray clean water through, then isopropyl alcohol (91%+) until spray is completely clear
- Remove the needle by unscrewing the needle chuck nut, wipe it clean with a cotton pad dampened with IPA
- Remove and clean the nozzle if accessible — use a soft nozzle cleaning brush, not a hard implement that could damage the delicate nozzle tip
- Wipe the paint cup and all external surfaces
- Re-lubricate the needle with a small drop of airbrush lubricant before reinsertion
Lacquer paints require lacquer thinner for cleaning — isopropyl alcohol will not dissolve cured lacquer. A dedicated airbrush cleaner bottle with lacquer thinner kept separate from your acrylic cleaning supplies prevents confusion and keeps the cleaning process efficient.
Never soak an assembled airbrush in cleaning solution — it can damage O-rings and seals. Partial disassembly, targeted cleaning, and careful reassembly extends the service life of an airbrush significantly. Properly maintained, a quality airbrush used regularly in modelling painting should last 10 years or more without major component replacement.
Building a Modelling Painting Workspace
The workspace in which you paint directly affects the quality of your results. Adequate lighting, ventilation, and organisation all contribute to better modelling painting outcomes.
Spray Booth
A spray booth is a box with an internal fan and filter that captures overspray and fumes at the source. For anyone airbrushing regularly indoors — including apartment dwellers — a spray booth is essential. Models such as the Paasche Airbrush Spray Booth or the Zeny Portable Spray Booth use replaceable activated carbon filters that absorb solvent fumes and a separate filter for paint particles. Dimensions of 40–50cm wide are sufficient for most scale models up to 1:35, though larger diorama bases may require a wider unit.
Even with a spray booth, adequate room ventilation matters — open a window behind you to create airflow through the booth rather than recirculating overspray within the room.
Lighting
Modelling painting requires accurate colour rendering. Standard warm-white LED bulbs produce a yellow cast that distorts paint colours when mixing and matching. Daylight-balanced LED bulbs with a colour rendering index (CRI) of 95 or above are the standard recommendation for modelling painting workspaces. A magnifying lamp positioned to eliminate shadows on the model surface also reveals surface texture and paint coverage issues that would otherwise go unnoticed until the varnish coat reveals them.
Organisation and Tool Accessibility
In active modelling painting sessions, having brushes, paints, thinners, and cleaning supplies within reach without cluttering the work surface prevents accidents and keeps focus on the model. A dedicated airbrush holder — either standalone or attached to the spray booth — keeps the airbrush safe between passes and prevents rolling damage to the needle tip, which is both costly and time-consuming to replace.
Getting Better at Modelling Painting — A Progressive Learning Path
Modelling painting is a skill that compounds over time. Each model you complete teaches you something the previous one did not. However, deliberate practice accelerates progress far more than simply building more kits.
A structured learning path for someone who has the basics and wants to develop genuine airbrush proficiency in modelling painting looks like this:
- Stage 1 — Control fundamentals: Practice airbrushing straight lines, dots, and graduated fades on cardboard using a single colour. This trains hand speed, pressure control, and distance judgement without consuming model time.
- Stage 2 — Single-colour modulation: Paint a simple vehicle model using only one base colour with modulation — lighter on top, darker in recesses. This forces you to master the airbrush before weathering becomes a crutch.
- Stage 3 — Wash and pigment integration: Add enamel washes and pigment weathering to the modulated base. Observe how each stage interacts with the previous one.
- Stage 4 — Multi-colour camouflage: Attempt a soft-edge three-colour camouflage using only the airbrush, no masking. This is where airbrush control in modelling painting reaches a meaningful level of complexity.
- Stage 5 — Miniature figures: Paint a 54mm or 75mm figure with the airbrush for zenithal priming and base coats, then finish with brush techniques. Figure painting demands precision that sharpens skills applicable to every other modelling painting subject.
Reference materials — particularly in-progress build logs from communities like Planetfigure, Missing-Lynx, and Scale Modellers Supply — show real-world application of these techniques with photographs at every stage. Studying how experienced modellers handle transitions, overspray, and problem recovery is one of the most efficient ways to develop judgement that only experience can otherwise provide.
Modelling painting is not a discipline where gear alone produces results. The modeller who understands why each step works — why a gloss coat helps a wash, why zenithal priming accelerates highlight placement, why low pressure produces soft edges with an airbrush — will consistently outperform someone who follows steps without understanding them. The techniques are the foundation; the judgement built through practice is what transforms them into something worth displaying.


