 English
 русский
Jun 22,2026
Content
- 1 The Short Answer: It Depends on What You Mean by "Soak"
- 2 Why Soaking a Whole Airbrush in Water Is a Bad Idea
- 3 What Parts of an Airbrush Can Safely Be Soaked in Water
- 4 How to Clean Your Airbrush Properly Without Soaking
- 5 What to Use Instead of Water for Stubborn Paint
- 6 The Difference Between Paint Types and How It Affects Cleaning
- 7 Common Signs You've Damaged Your Airbrush With Improper Soaking
- 8 Airbrush Maintenance Best Practices to Avoid Cleaning Problems Altogether
- 9 Frequently Asked Questions About Soaking an Airbrush
The Short Answer: It Depends on What You Mean by "Soak"
If you're asking whether you can submerge your entire airbrush in water and leave it overnight, the answer is no — and doing so can seriously damage your airbrush. However, if you're asking whether water can be used as part of a cleaning routine for water-based paints, the answer is yes, with important caveats. The distinction matters a great deal, and understanding exactly what gets wet — and for how long — is what separates good airbrush maintenance from an expensive mistake.
Many beginners assume that because water is harmless and an airbrush handles liquid, soaking the whole tool in water must be a safe way to loosen dried paint. This logic is understandable but flawed. An airbrush is a precision instrument with metal parts, seals, o-rings, springs, and needle components that respond very differently to prolonged water exposure. Some parts tolerate moisture well; others corrode, swell, or degrade quickly.
This article breaks down exactly what you can and cannot soak, how long is safe, what solvents or cleaning agents work better for tougher jobs, and how to build a cleaning routine that keeps your airbrush functioning at its best for years.
Why Soaking a Whole Airbrush in Water Is a Bad Idea
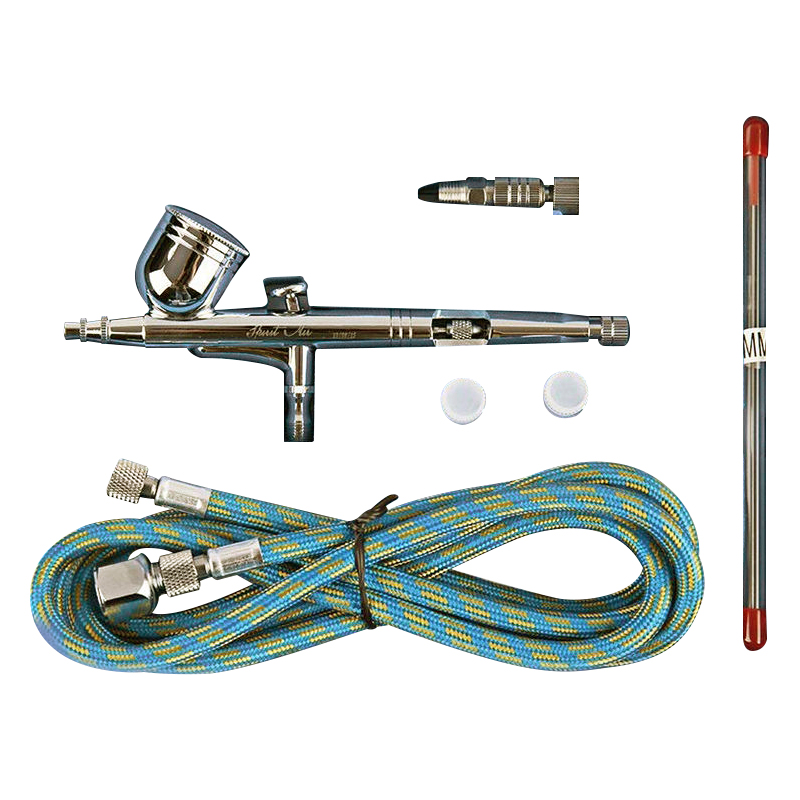
A complete airbrush — even a basic gravity-feed model — contains numerous small components that are not designed for prolonged submersion. Here's what goes wrong when you soak the whole unit:
Corrosion of Metal Parts
Most airbrush bodies are made from brass, chrome-plated brass, or aluminum alloy. The needle is typically stainless steel. While stainless steel is rust-resistant, extended water exposure — especially tap water, which contains minerals and chlorine — can cause surface oxidation over time. Chrome plating can develop micro-pitting, and internal brass components may discolor or corrode, especially if water sits in crevices that don't dry out completely.
Degradation of Seals and O-Rings
Airbrushes rely on rubber or PTFE (Teflon) o-rings and seals to maintain airtight pressure and prevent leaks. Prolonged water exposure causes rubber o-rings to swell and lose their shape, which leads to poor seals, air leaks, and inconsistent spray patterns. Once an o-ring is distorted, it often needs to be replaced rather than restored.
Loosening of Threaded Connections
The threaded connections between the nozzle, nozzle cap, body, and needle chuck can loosen when soaked in water. As water seeps into the threads and then dries, mineral deposits build up, making components difficult to unscrew — or causing them to cross-thread when reassembled.
Spring and Internal Mechanism Damage
Inside a double-action airbrush, there are fine springs that control needle return and trigger tension. These springs, often made from carbon steel, are highly susceptible to rust if left wet. Even a single overnight soak can produce enough surface rust to affect spring tension and trigger feel noticeably.
What Parts of an Airbrush Can Safely Be Soaked in Water
Selective soaking is the right approach. Some airbrush components tolerate water soaking quite well, particularly when you're dealing with water-based acrylic or watercolor paints. The key is knowing which parts to remove first and how long to let them sit.
| Component | Safe to Soak? | Recommended Time | Notes |
|---|---|---|---|
| Nozzle (metal) | Yes | 5–30 minutes | Dry immediately after |
| Needle cap / head cap | Yes | Up to 1 hour | Chrome finish; dry thoroughly |
| Paint cup (gravity feed) | Yes | 15–30 minutes | Rinse with distilled water |
| Needle (stainless steel) | Yes, briefly | Under 15 minutes | Pat dry immediately; do not leave wet |
| O-rings / seals | Avoid | Not recommended | Can swell and deform |
| Springs / trigger mechanism | No | Never soak | Carbon steel; rusts quickly |
| Full assembled airbrush | No | Never | Multiple damage risks |
The paint cup and nozzle are the most practical candidates for a quick water soak after a session using water-based acrylic paints. Warm water (around 40°C / 104°F) works better than cold, as it softens dried acrylic more effectively. Do not use boiling water, as extreme heat can warp metal components or loosen soldered joints on cheaper airbrush models.
How to Clean Your Airbrush Properly Without Soaking
A well-maintained cleaning routine eliminates the temptation to soak in the first place. Most paint residue — including dried acrylic — can be removed with a combination of proper flushing, targeted soaking of individual components, and a few basic tools.
Step 1: Flush While Paint Is Still Wet
The single most effective thing you can do is clean the airbrush immediately after use, before paint has any chance to dry. Empty the paint cup, then add a small amount of appropriate solvent — water for water-based paints, lacquer thinner or dedicated airbrush cleaner for solvent-based paints. Spray through the airbrush into a cleaning pot or paper towel until the spray runs clear. This process takes under two minutes and prevents 90% of the stubborn residue problems that lead people to consider soaking in the first place.
Step 2: Backflush to Clear the Nozzle Area
Place your finger over the needle cap to block the nozzle opening while pressing the trigger down for airflow. The pressure reverses into the cup, creating a bubbling action that loosens paint from the nozzle passage. Do this several times with fresh cleaner in the cup. Backflushing is especially useful for gravity-feed airbrushes where paint residue tends to collect around the nozzle seat.
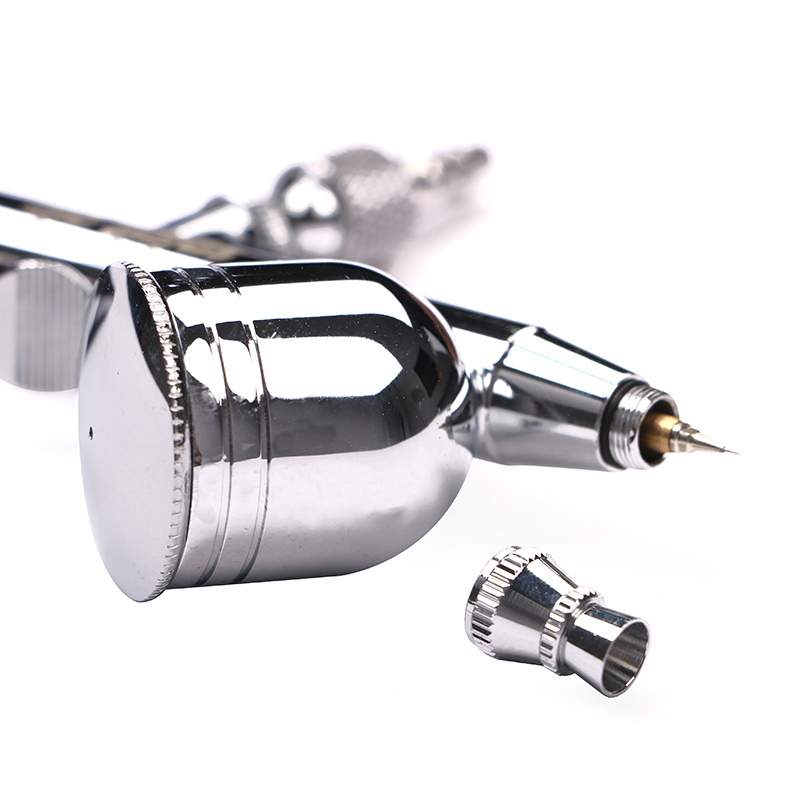
Step 3: Remove and Clean the Needle
After flushing, unscrew the needle chuck at the back of the airbrush and gently slide the needle backward — never forward, as this can damage the nozzle tip. Wipe the needle from back to tip with a lint-free cloth dampened with cleaner. Check for paint buildup near the tip, which is the most common area of residue accumulation. If there is dried paint, a cotton swab lightly moistened with water (for acrylics) or appropriate solvent can remove it without the need for soaking.
Step 4: Clean the Nozzle Separately If Needed
The nozzle is the one component that benefits most from occasional soaking. After removing it from the airbrush body, place the nozzle in a small container with warm water (for water-based paints) or appropriate solvent. Leave it for 5 to 15 minutes, then use a nozzle cleaning pin or a fine bristle brush to gently work through the opening. Never force a tool through the nozzle orifice, which on some airbrush models is as small as 0.15mm in diameter. Forcing anything through that opening can permanently widen or damage the nozzle.
Step 5: Dry Everything Completely Before Reassembly
After any cleaning involving water, all metal components must be completely dry before reassembly. Use a lint-free cloth or a can of compressed air to remove moisture from crevices. Leave components on a clean dry surface for at least 10–15 minutes before putting the airbrush back together. Trapping moisture inside the body during reassembly is a leading cause of internal corrosion.
What to Use Instead of Water for Stubborn Paint
Water is only appropriate for water-based paints that are still relatively fresh. For dried or cured paint — or for oil-based, enamel, or lacquer paints — water is ineffective and wasting time with it increases the risk of prolonged exposure damage. Here are better alternatives:
- Dedicated airbrush cleaner: Products like Vallejo Airbrush Cleaner, Medea Airbrush Cleaner, or Createx Airbrush Cleaner are formulated specifically for airbrush use. They dissolve acrylic paint — even partially dried — without harming seals or metal. These are safe for brief soaking of metal parts and dramatically more effective than plain water on dried paint.
- Isopropyl alcohol (IPA) at 70–91%: Effective on acrylic paints and safe for metal airbrush parts when used in small amounts. Do not soak rubber o-rings in IPA, as it can cause rubber to swell or crack. Limit soaking of metal components to 5–10 minutes.
- Lacquer thinner: Necessary for cleaning lacquer paints from an airbrush. Use in a well-ventilated area and only on metal components — lacquer thinner dissolves rubber seals very quickly. This means full disassembly before any lacquer thinner contact.
- Mineral spirits or odorless turpentine: For oil-based or enamel paints. Soak individual metal parts (nozzle, needle cap) for up to 20 minutes. These solvents are gentler than lacquer thinner but still not compatible with rubber components.
- Commercial ultrasonic cleaner: A step up in equipment, but ultrasonic cleaners filled with water or appropriate cleaning solution are excellent for deep cleaning of disassembled metal airbrush parts. The ultrasonic vibration dislodges dried paint without requiring aggressive soaking. Many professional airbrush artists and model painters swear by this method for detailed part cleaning.
The Difference Between Paint Types and How It Affects Cleaning
What you're cleaning out of the airbrush is as important as how you clean it. Different paint types require fundamentally different approaches, and using water in situations where it's inappropriate is a common beginner mistake.
Water-Based Acrylics
Brands like Vallejo Model Air, Citadel Air, Tamiya (water-based), Createx, and Badger Minitaire all use water as their carrier medium. When these paints are wet, water alone is sufficient to flush the airbrush. However, once acrylic paint has dried inside the airbrush — which can happen in as little as 5–10 minutes in warm dry conditions — water alone is not effective. Dried acrylic forms a tough polymer film that requires a dedicated cleaner, IPA, or extended soaking of individual parts to dissolve.
Solvent-Based Lacquers
Brands like Mr. Color, Alclad II, and Tamiya lacquer thinners use organic solvent carriers. Water is completely useless for cleaning these paints from an airbrush. Using water on a lacquer-loaded airbrush just dilutes the paint without dissolving it, potentially making cleanup harder. Use lacquer thinner or Mr. Color Leveling Thinner, and keep these away from any rubber components.
Enamel Paints
Enamel paints used in airbrushing (such as Humbrol, Testors, and AK Interactive enamels) are oil-based and require mineral spirits, white spirit, or enamel thinner for proper cleaning. Water will not dissolve enamel. Attempting to soak airbrush parts in water after running enamel through the tool will leave paint residue behind and may cause the paint to partially cure inside the nozzle.
Watercolor and Ink
Liquid watercolors and illustration inks used in airbrushing — popular for illustration, textile, and nail art — are the most forgiving. They are highly water-soluble and flush out easily. For these media, brief water soaking of individual components is entirely appropriate and effective. After a watercolor session, simple flushing with warm water is usually sufficient for thorough cleaning.
Common Signs You've Damaged Your Airbrush With Improper Soaking
If you've already been soaking your airbrush in water — either the whole unit or for extended periods — here are the signs to watch for that indicate damage has already occurred:
- Air leaks from the nozzle area at rest: This often indicates a damaged or swollen o-ring around the nozzle seat. The airbrush hisses even when you're not pulling the trigger back, which wastes compressor air and makes pressure control impossible.
- Stiff or sticky trigger action: This usually means corrosion on the needle chuck or internal mechanism, or a warped spring. The trigger should feel smooth and precise; any resistance or grittiness indicates internal damage.
- Rust-colored particles in your spray: Visible rust contamination in the spray pattern means internal spring or body corrosion has progressed significantly. This will ruin any paint job and requires full disassembly and part replacement.
- Difficulty threading or unthreading the nozzle: Mineral deposits from tap water build up in threads over time, creating a gritty resistance. Forcing the nozzle can strip the delicate threads, making the nozzle seat unusable.
- Inconsistent spray pattern (spitting or pulsing): A partially blocked or damaged nozzle, often from mineral deposit buildup inside the nozzle orifice, creates irregular spray patterns that are difficult to control even with proper technique.
Most of these issues are repairable if caught early. Manufacturer rebuild kits typically include replacement o-rings, seals, and needles for under $15–20, which is far cheaper than replacing the entire airbrush. Brands like Iwata, Badger, Harder & Steenbeck, and Paasche all sell comprehensive spare parts.
Airbrush Maintenance Best Practices to Avoid Cleaning Problems Altogether
Prevention is always easier than repair. Building good habits around airbrush use significantly reduces the need for aggressive cleaning and eliminates the temptation to soak.
Clean Immediately After Every Session
This cannot be overstated. A three-minute flush after every use is worth far more than an hour of soaking and scrubbing later. Keep a cleaning pot and appropriate solvent on your work surface at all times so there's no friction to doing it right away. Artists who build this into their workflow almost never deal with clogged nozzles or dried paint buildup.
Do a Deep Clean Every 5–10 Sessions
A full disassembly clean — removing needle, nozzle, needle cap, and paint cup — should happen every few sessions or whenever you notice any change in spray quality. During this deep clean, individual metal parts can be soaked briefly in the appropriate cleaner, and all components inspected for wear or paint buildup in hard-to-reach areas.
Use Distilled Water Instead of Tap Water
If you do use water for cleaning or thinning water-based paints, distilled water is significantly better than tap water. Tap water contains dissolved minerals (calcium, magnesium, chlorine) that leave deposits inside the airbrush as they dry. Over time these deposits narrow the nozzle passage and create performance issues. Distilled water leaves no residue and is inexpensive — typically under $1 per liter.
Lubricate the Needle and Seals Regularly
A small drop of airbrush needle lube or Vaseline on the needle before reinsertion protects the needle packing seal and ensures smooth trigger action. This lubrication also acts as a mild barrier against moisture infiltrating the internal mechanism. Most professional airbrush users apply a tiny amount of lube every time they reassemble after cleaning.
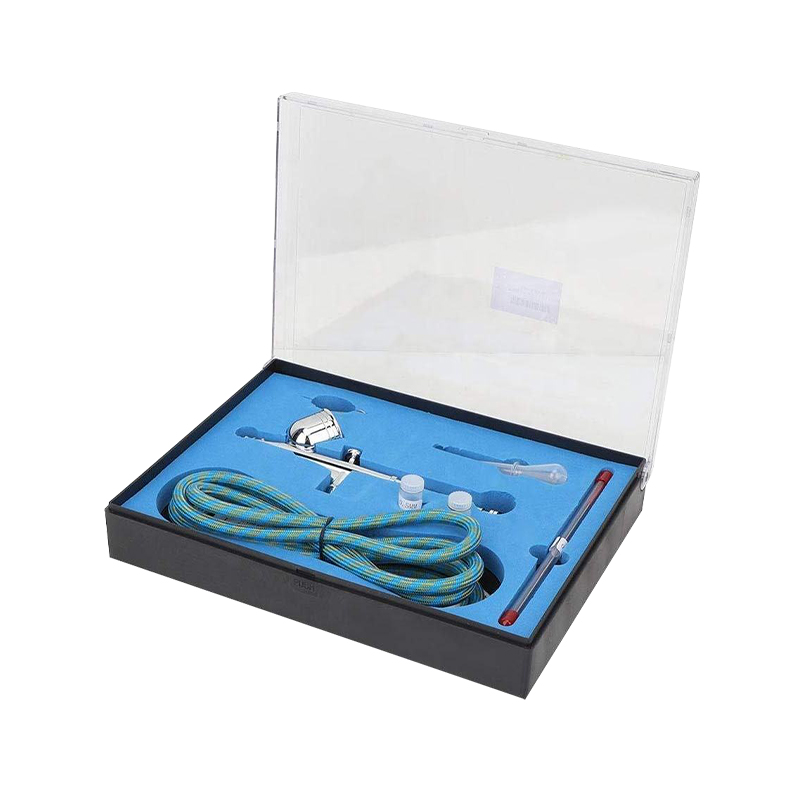
Store the Airbrush Dry and Capped
After cleaning and drying, store the airbrush with the needle cap in place to protect the needle tip, and with the paint cup covered if possible. Store in a case or protective pouch away from dust and humidity. Avoid storing airbrushes in bathrooms or damp workshops where ambient humidity accelerates corrosion of internal metal parts.
Frequently Asked Questions About Soaking an Airbrush
Can I soak the airbrush nozzle in water overnight?
For a metal nozzle with dried water-based acrylic paint, an overnight soak in water is technically possible but not recommended. A better approach is 15–30 minutes in a dedicated airbrush cleaner, which will dissolve the dried paint more effectively and with less risk of mineral deposit buildup from prolonged tap water exposure. If you do soak overnight, use distilled water and dry the nozzle thoroughly before reinstalling.
What happens if my airbrush accidentally gets fully submerged?
Rinse it with distilled water to remove any soap or solvent residue, then disassemble it as fully as possible. Shake out excess moisture and use compressed air to blow through all openings. Lay the parts on a clean dry cloth and allow at least 24 hours to dry completely before reassembling. Check for any corrosion on springs and internal mechanisms before use.
Is it safe to use soapy water to clean airbrush parts?
Mild dish soap in warm water can help clean metal components of water-based paint residue. However, ensure no soap enters the internal mechanism, as soap residue can cause fish-eye effects in subsequent paint jobs and is difficult to fully flush out. Rinse metal parts thoroughly with distilled water after any soap use and dry completely.
Can I put airbrush parts in a dishwasher?
No. Dishwashers use high-temperature water, harsh detergents, and high-pressure spray that will damage o-rings, strip chrome plating, and potentially warp or corrode delicate parts. The heat alone (typically 55–70°C / 130–160°F) is enough to distort rubber seals and soften certain metal alloys used in budget airbrush components.
How long does it take to damage an airbrush by soaking it in water?
Spring corrosion can begin within 12–24 hours in tap water. O-ring swelling may be noticeable within a few hours. Mineral deposit buildup on threaded parts and nozzle passages is a slower process but becomes visible and functionally significant after multiple prolonged soaks over weeks or months. A single overnight soak of the assembled airbrush can be enough to cause measurable trigger stiffness and early o-ring deformation in lower-end models with less corrosion-resistant materials.


